Saturday, March 26, 2011

A work in progress

I was told it would be interesting to see one of my Paper Mache Clay (PMC) sculptures as a work in progress.  I’m going to try and share with you some of the steps involved in creating one of my pieces.

I start by making a batch of PMC.  I got the recipe from a website called Ultimate Paper Mache.  This site belongs to Jonni Good who developed this recipe and posted it to share with the rest of us.  This is a fairly inexpensive compound made with paper pulp, joint compound, Elmer’s glue, flour and linseed oil. The hard part is getting all of the ingredients blended together so there are no lumps of paper pulp.  This is also one of my least favorite parts of the whole thing. I bought a hand held electric mixer to use for mixing the “dough” and burned out the motor after only four or five batches.


Next step is deciding what I’m going to make. I know it’s going to be a Santa, but I don’t know anything else about it. Sometimes I will get out the old sketch book and try to recreate on paper one of the many ideas that are floating around in my head.  I might draw several head shots with different hats. I might draw an idea of the complete figure and include choices for color of hat and cloak etc.  Once I have a general idea of what the piece is going to look like I need an armature.


PMC is applied in thin layers over an armature. I don’t like leaving the armature in the piece as I’m afraid it won’t dry thoroughly with it inside, so I need to keep that in mind when making the armature. Once the armature is made I put a plastic grocery bag over the armature and secure it in place. The plastic covered armature is then covered with paper strips that have been coated with flour and water paste. I use a stiff bristled paint brush to smooth the paper strips. I usually apply 2 – 3 layers of strips.  Here comes the first wait for it to dry stage.  You will note that there are many such periods where I have to wait for it to dry throughout this process.


After the paper strips have dried, the first layer of PMC is applied evenly.  Now I’m at the second wait for it to dry stage.  What I’ve made so far is what I refer to as a blank.

Once the blank is completely dried and hardened, it needs to be filed and sanded smooth.  This is another of my least favorite things to do.  PMC dries extremely hard and it takes forever to smooth down the ridges and bumps not to mention all of the dust from filing, grinding and sanding. My sister and I are concerned about the amounts of paper dust that we inhale. We’ve both tried wearing dust masks but found they get in the way of blowing off the dust on the part or drinking from our coffee cup. I’ve tried doing both with a mask on.  I’ve also worn the dumb thing around my neck or on the top of my head for the rest of the day.

Now it’s back to filing and sanding and grinding again. More detail is added to the piece and then more drying time.  This process is repeated until I decide the piece is finished.  Now it has to be completely dried.  Once parts are completed I usually leave them in the oven for several hours and then on the heater vent over night.  The PMC has to be totally dried before it can be painted.


Now the fun part begins.  This is where the piece starts getting interesting.  Arms and mittens, collars and hats, hair and beards and all sorts of fun things are modeled onto the blank.  Anything that protrudes away from the body has to be supported in some manner, so little armatures that remain in place get added onto the blank. I use rolled up bits of cardboard and wads of paper or pieces of egg carton for these add-ons.  Once I’ve added more PMC I’m again at a wait for it to dry stage.  I’ve found that I can hurry the drying along by putting the piece into the oven at 190 degrees or sitting it on a drying rack with a space heater facing it.  My sister has several floor heater vents she sits her pieces on.  I’m not so lucky.


Now, I like this part. Adding color makes the piece come alive.  Once I’m finished painting and the paint has had sufficient time to dry I seal the figure with a satin finish spray sealer.  Next I use an antiquing stain and then another coat of sealer, this time I use a matte finish.


Like every other man, Santa has chores. On this particular day he is going to split logs for the fire place. Since the chopping block is near the stable, he has brought carrots for the reindeer.  We all know that Santa is jolly, so of course he is whistling while he does his chores.


When I sketched this piece I had planned on the scarf only being visible from the back, but decided he should tuck his beard inside his cloak and have the scarf tied in front. I’ve wanted to paint something plaid for a while now and thought this would be the perfect time to do it.

I hope this has been helpful in giving you an idea of how I spend nearly every waking moment of my day. Just joking.

Thanks for dropping by.

Tuesday, March 22, 2011

Ded Moroz (Grandfather Frost)

Whatever you call him, the Gift Bringer of Christmas owes his existence and spirit of generosity to St. Nicholas, Bishop of Myra. Nicholas' Feast Day is December 6th and has been observed in Russia for centuries where St. Nicholas was once known as Father Christmas. St. Nicholas is, also, a Saint in the Roman Catholic Church. During the Soviet Era, the celebration of the Nativity of Christ was forbidden. But, the spirit of St. Nicholas endured in the person of Ded Moroz, Grandfather Frost.

Ded Moroz, or Grandfather Frost, came to Russia in the late 1800s, providing tthat country a counterpart to the Western, secular Santas.
Unlike the Western Santa Claus, Ded Moroz typically is a tall, slender gentleman with a long white beard. He would wear long, lavishly adorned robes. Often, Ded Moroz would be depicted in a costume very similar to a bishop's clerical garb; red Cossack, white lace surplice, long red cape with gold adornment and the tall, pointed Bishop's hat.

During the Soviet Era, Ded Moroz's robes were usually blue. His home is a log house in the wooded village of Viliky Ustyug, Vologodskaya region in northern Russia about 500 miles northeast of Moscow. Ded Moroz travels, of course, in a troika; a decorated sleigh drawn by three horses. He is assisted by Snegurochka (the Snow Maiden) who, it is said, is Ded Moroz's granddaughter. I may decide to sculpt Snegurochka at some future time.

Another difference between Ded Moroz and the Western Santa is the way he delivers his gifts. Ded Moroz does not slide down a chimney nor does he land his sleigh on roof tops. Rather, he visits only good boys and girls, door to door. Like Santa, Ded Moroz will not visit homes where the children are awake; even if they have been good all year long. It is, also, a common practice to leave out food for Ded Moroz, just like Westerners set out cookies and milk for Santa.

When I decided to create my version of Ded Moroz I chose to make him wearing a blue cloak and robes so his appearance would be set apart from some of the other gift-bringers I intend to make which are typically dressed in red. I also thought that it would be fun to paint a pattern on his clothing. I originally thought of painting the snowflakes on the lighter blue of his robes with the darker blue of the cloak but decided that they would look better painted white. I’m glad I made that decision as I’m pleased with the way they look and the way this piece turned out.


Because of all of the blue and white on this piece I wasn’t sure how or if I would use an antique finish on the completed piece. I normally apply a heavy antiquing stain usually walnut over the completed sculpture to age its appearance. I didn’t feel this piece would look right with the brown of the stain and was thinking I’d omit this step. I finally decided to mix a charcoal tint into my antiquing medium. The antiquing softened the white of the snowflakes on his clothing and added depth to his beard.


A friend of my son’s was at our house when I was working on this piece. He’s seen most of the completed pieces but had never seen one in progress. He said the completed pieces look like they could be made of plaster of Paris that someone had painted but after seeing how they look when I’m working on them was something else. He thought I should take pictures of the work in progress and include those pictures when I blog. I may do that at some point but not now.


I’m not sure what my next project will be. I have to make a batch of PMC before I can make anything. I do have what I refer to as a blank drying at the moment, but at this point that’s pretty much what’s in my brain. I haven’t decided who or what it will turn out to be.


Ded Moroz was the 20th piece that I’ve completed since I started sculpting on the 8th of January. Working with PMC is something I’ve done every day since. I don’t do much of anything else. After seeing what some of you have been doing with water colors and pastels, I’ve thought of trying to paint or draw again. I have pencils and water colors. I have acrylic paint and oil paint. I have all types of papers and some canvases, but none of these things are calling to me right now.


Maybe I'll just open a couple of boxes of those supplies and see if anything happens.

Thanks for dropping by.

Wednesday, March 16, 2011

Baboushka

In my research of Santa Claus, I’ve come across several legends from around the world for the figure that represents the spirit of giving in other countries.
Santa Claus is the name we Americans have given to our legend of the Christmas gift-bringer. When referring to the legendary figures of Christmas from other countries we refer to them as Old World Santas when we should probably be calling them old world gift-bringers.  Not all of these gift-bringers were men either as you will learn from the following story. 
In old Russia, one of the most commonly known givers of gifts was an old woman known as Baboushka (which means grandmother in Russian). Baboushka lived alone in a big house that required constant upkeep. She had lived alone for so long that her days and her thoughts were filled only with cleaning, cooking, mending and spinning. She had no family and rarely received visitors. Her large home near the road consumed her days.

One cold evening while scrubbing her floors, she heard a knock at the door. She looked out the window and saw three noblemen, finely dressed so she opened her door to them and invited them in from the cold.

"We are traveling to Bethlehem to find the Child who is born a King and bring him fine gifts," said one of the wise men to her. "Won't you please come with us to find him?"

The old woman explained that her floors were not yet clean and that she could not possibly leave her home. She invited them to rest by the fire and she would prepare them a meal. They said they must not delay their journey so they bid her farewell and went on their way.

Late that night by the light of the fire, she pondered upon the men who had visited her and, more importantly, of the Child of whom they spoke. She regretted deeply, for some reason, not having gone with them now. She gathered a few trinkets from among her meager possessions as gifts for the Child and set off into the cold night to find the noblemen. She walked and walked, inquiring after the traveling men and the Child who would be King but no one knew where to find them.

Legend has it that she continues to this day, traveling the lands in search of them. On Epiphany Eve, she leaves her trinkets in the homes of good children she visits in hopes that they too will search for the Child.

I decided to add to my collection of gift-bringers by sculpting Baboushka. I like the looks of the Russian nesting dolls and let their proportions and shape influence my sculpture. Since she began her search in the 17th century I decided that her clothing was more than likely dark and very simple as she was a woman of little wealth.


I’m working on another Russian gift-giver, Ded Moroz and when I have him completed I will show you how he turns out.

Thankyou for stopping by.

Sincerely,

Maddyrose

Sunday, March 13, 2011

Day Light Savings

I forgot all about setting my clocks ahead before going to bed last night, and wasn’t even thinking about Day Light Savings when I logged on to my computer this morning so was a bit thrown off when I realized I’d already lost an hour of my day.
I always get up early.  For me, sleeping in would be if I awoke at 6:00 in the morning.  I’m usually up by 3:00.  This morning when I awoke and looked at my clock and it was nearly 4:30. I wasn’t too surprised that I’d slept in as my daughter and I spent hours shopping yesterday and after all that walking I figured I’d been more worn out than I thought.  I still wasn’t thinking about Day Light Savings so I went about my normal routine, making my coffee and settling in at the computer to check my email and blog list. 
For whatever reason my computer is running a bit slow this morning so while I was waiting I happened to glance at the clock in the corner of the monitor and saw that it was 5:48, however when I looked at the wall clock it said 4:48.  I looked back to the clock in the corner of the monitor and then back to the wall clock a couple of times just to be sure I was seeing things correctly and that’s when the little, very dim light went on above my head. DUH!
Now, I’m really bummed.  Not only did I actually sleep in this morning and loose precious work time, things are further complicated by this lame-brained idea that we need to force the day ahead by one hour. 
While checking new posts on the blogs I follow I discovered that I’m not the only one who is disgruntled by losing an hour of my day.  I’m never going to get that time back.  I know, I know.  We get an extra hour in the fall, but I’m not going to be able to use it for what I was going to use it for today.
This morning I’m planning to begin painting my latest piece.  I’m a bit nervous about this one as it’s different than the other pieces I’ve been making.  This is my first attempt at making the Mrs. 
When sculpting the Mister, that lovely beard of his lends a certain element that makes him so, so appealing.  Things are different with the Mrs.  There she is, bare faced, double chin saggy jowls and not nearly as attractive as the Mister. Now that I think about it, nothing is attractive as the Mister.
Before I begin painting I thought I’d show you that very first Santa that started this addiction to making PMC Santas.


The bag of toys doesn't look like much in the photo, but if you could get a closer look you'd see two dolls, a Teddy and a bunny, a jack-in-the-box and a dragon.
I'd better get to that painting.  Come back and visit when you can.

Hugs to all,
Maddy Rose

Friday, March 11, 2011

The Belsnickle Santa that almost wasn't

Today I'm going to introduce you to one of my favorite Santas.  This Santa nearly didn't get completed because of an incident that happened in the early stages of his development. 

When I'm working on a peice I become impatient when I have to stop working and wait for the piece to dry.  To hurry the drying along I've discoved that a couple of hours in the oven helps.  I employ other methods but this is the quickest way to dry a piece. When I was making the snowkids this method worked without a problem because they are short enough to stand on a cake rack on the bottom shelf of the oven.  This Santa on the other hand is too tall to stand upright, so I decided to lay him down to bake. Big mistake.

I was painting another Santa when my son informed me that whatever I had cooking in the oven had gone flat. My son is a great kidder and I wasn't sure I should believe him, so I went to look for myself.  I opened the oven door, looked in and saw one really flat paper mache cone.  When I say flat, I mean really flat.  I was sure he was a goner.  He nearly ended up in the trash can, but being me I had to try to save him.  I hate for things to go to waste.  After holding him under the faucet and running warm water over and through him I force the cone open as far as I could.  I couldn't get it to open completely, but that only gave him a more interesting shape.  This was the first of my Santas where you can see the toe of one of his boots.  That wasn't my intention when I started making him, but I'm really glad things worked out the way they did.

When I work on a piece I don't always have one clear idea of what I'm trying to make.  I start out with a general idea of what I want and then let the peice I'm working on have some say in how it will turn out.  For instance I've worked on a Santa for days thinking that I was going to be painting his cloak blue then for whatever reason, I end up painting it red.  I've told my sister, the other Santa artist that my peices have some say in how they want to turn out, and she told me the same is true for hers.

Now that you've heard the story behind this Belsnickle Santa here he is:


This is the third Santa that I made and he has eliments that the first two do not.  His left arm is extended and holding onto a staff.  His hair is different from my other Santas as it's "wind swept". Notice the branches in the basket on his back?  Those are actually very small branches from my yard that have been preserved.

Well, what do you think?  Not too shabby looking for something that nearly ended up in the trash can.

Thanks for dropping by.

Sincerely,
Maddy Rose

Tuesday, March 8, 2011

The Snow People

Here I am again.  I've been sorting through some pictures I took of my paper mache projects and found some I'd like to share with you.

When I first started sculpting I made a snow family. My sister was already making sculptures of Santa and I figured one Santa artist in the family was enough. Since I've always had a soft spot in my heart or head for snowmen, adding to my already impressive collection seemed like the thing to do. Also making snow figures seemed somehow easier.  Carrot nose and coal eyes, what could be easier? Sure, there's arms and maybe a hat or scarf, but all in all still pretty simple. 
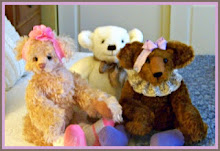
I started out by making a little girl holding a rag doll.  I enjoyed making her so much that I decided to make her a little sister.  One piece lead to another and soon I had a family of seven.  Following are a few pictures of them.

Here's Crystal with her mother and baby sister.


Here are the snow kids with their father


Here are the four children
                                                             
I've decided that if I make any more snow people they will all be children as they are so much fun to make and look at.
So now you've seen my snow people. Did they bring a smile to your face like they did to mine? Let me know what you think.

Sincerely,
Maddy Rose

Sunday, March 6, 2011

I'm new to this so please be patient

I can't believe I'm actually doing this. It's a bit scary but I think I can do it.

Up until recently I didn't even know what a blog was. I was visiting my sisters and the youngest said she had a blog. I'm thinking, "What in the heck is a blog?" I figured I'd better check out what she was doing, so I visited her blog. Then a couple of months later the other sister says she's got a blog too. With both of them blogging and having such a good time doing it I thought why not. I just got back from spending a week visiting with them and now I too have a blog. I needed help getting started.

One of my sisters and I share a passion for sculpting with paper mache clay. Not only are we both hooked on the stuff, we have the same subject that we feel compelled to sculpt over and over.  Between the two of us we've captured his likeness at least two dozen times.  Can you guess who I'm refering to?  It's the mister of course.  I have a picture of one of my sculptures I'd like to share with you.


Well, here's the mister.  He's taking the dog for a walk.  The snow gets too deep for the dog to walk on his own, so Kris has to carry him.

This is about all I've got time for this time around.  Hope to hear from you.

Sincerely,
Maddy Rose  (aka Mrs. Claus)